When you receive a sample from your factory or samplemaker, it is an exciting time! It is also a time to get critical about the quality. Samples give you the opportunity to test the production quality before committing to your full order. So, grab your sample, turn it inside out, and let’s evaluate the sewing quality.
Take measurements
The first thing to do when you receive a new sample from your factory or samplemaker is to measure it against the spec in the tech pack. The measurements of the sample are more important for fit than sewing quality, but if the measurements don’t meet spec, that can indicate a problem with sewing. For example, if the sample doesn’t meet spec, it could be that it was cut wrong, but it could also be caused by sewing with incorrect seam allowance.
Compare sewing to the tech pack
Next, compare the types of stitching and seams used in the sample to the construction callouts in the tech pack. Was the sample sewn the same way? If not, ask the factory why they used a different construction. It may be that they don’t have the machine needed to sew the seam spec’d in the tech pack or it could mean they didn’t read the tech pack carefully. Don’t assume the worst, but start a kind conversation to find out what happened.
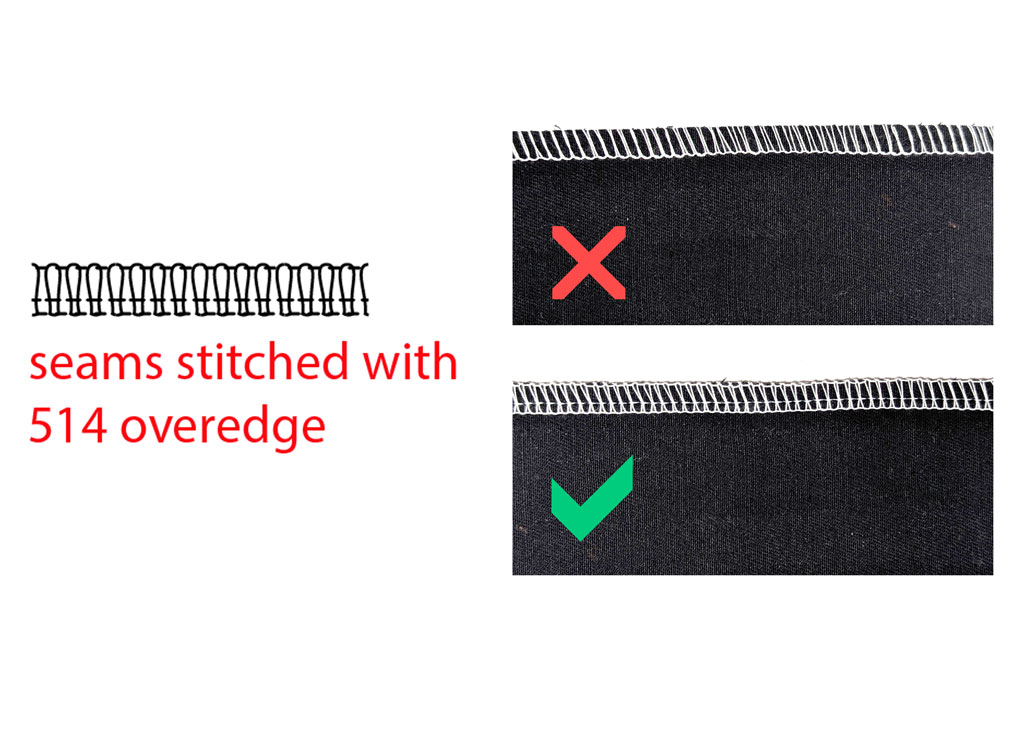
Top left: stitching doesn’t match callout (it is 504 overedge not 514).
Bottom left: stitching matches tech pack callout.
Measure stitch length
Stitch length is measured in stitches per inch (SPI). Different types of stitches and types of fabric use different SPI for best performance. Generally, higher quality goods as well as highly stretchy fabrics use tighter stitching (higher SPI) compared to cheaper or non-stretch styles. This is not universally the case, though. If you aren’t familiar with SPI best practices for your sample type and the SPI is not called out in the tech pack, consult your patternmaker or factory.
The main thing to look for – regardless of stitch length – is consistency. The look and function of the seam is best when the stitches are an even, consistent length. A variation of 1-3 stitches per inch is normal, but if one part of the seam has 8 SPI and another has 16 SPI, that is a problem. Look for a consistent look across each seam and topstitching line.
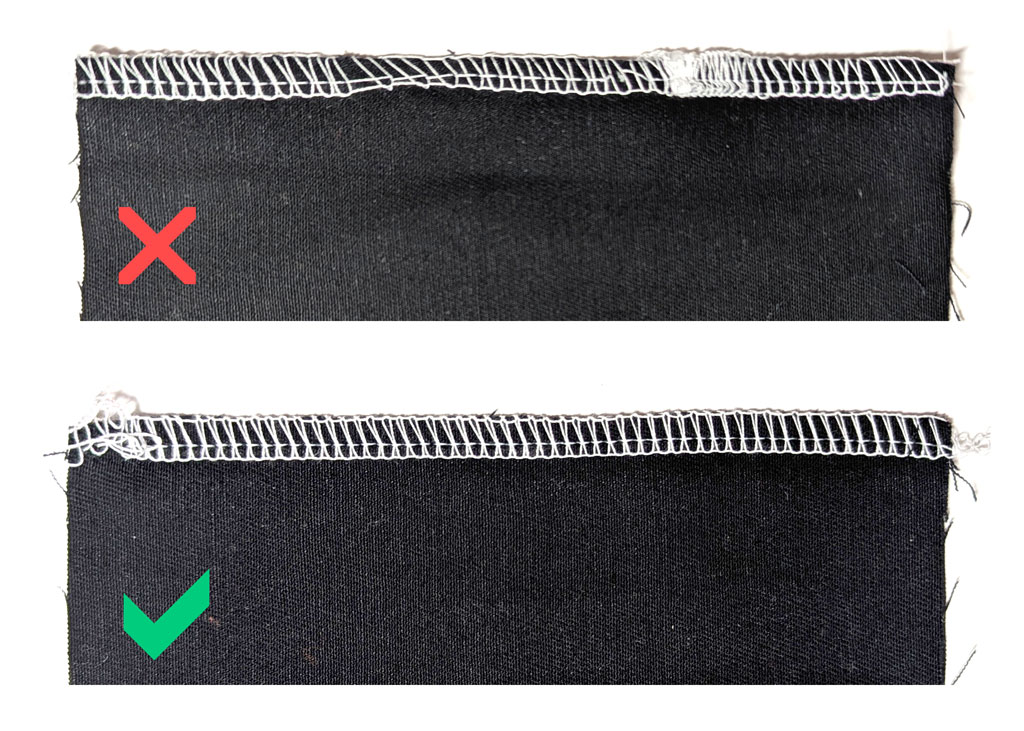
Bottom: 514 overedge stitch with even stitch length
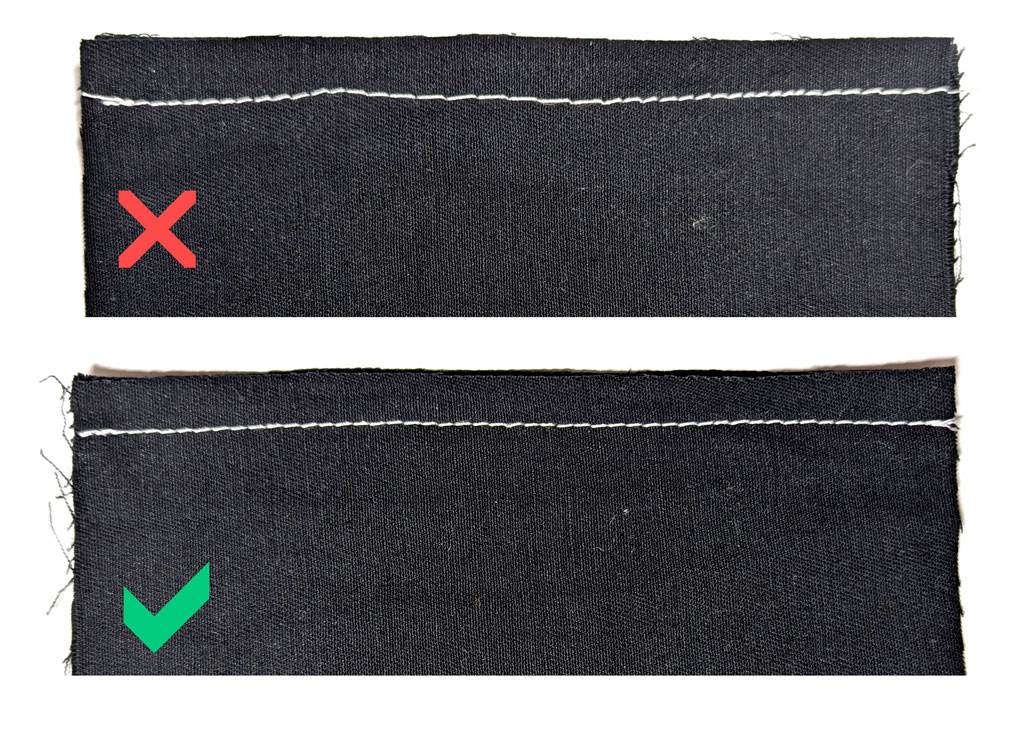
Bottom: Top: 301 overedge stitch with even stitch length
Look for seam allowance evenness
Just as stitch lengths should stay consistent, seam allowances should too. A wavy seam line can cause bunching or ill fit in the garment. Well-sewn hems and seams are an even distance from the edge.
Keep in mind that darts don’t count here. A dart’s seam line should be smooth and even, but the dart allowance changes from top to bottom of the dart. There are also rare cases when a seam allowance does vary, but it would be a smooth transition from one allowance to the other, not a wavy haphazard stitching line.
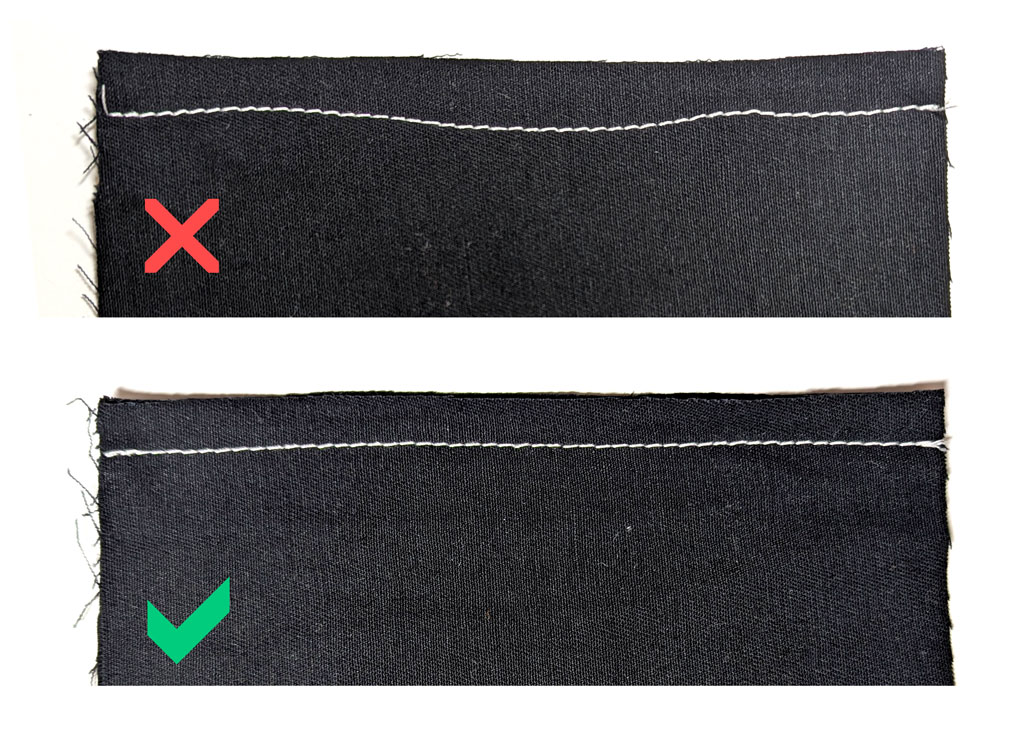
Bottom: even seam allowance and stitching
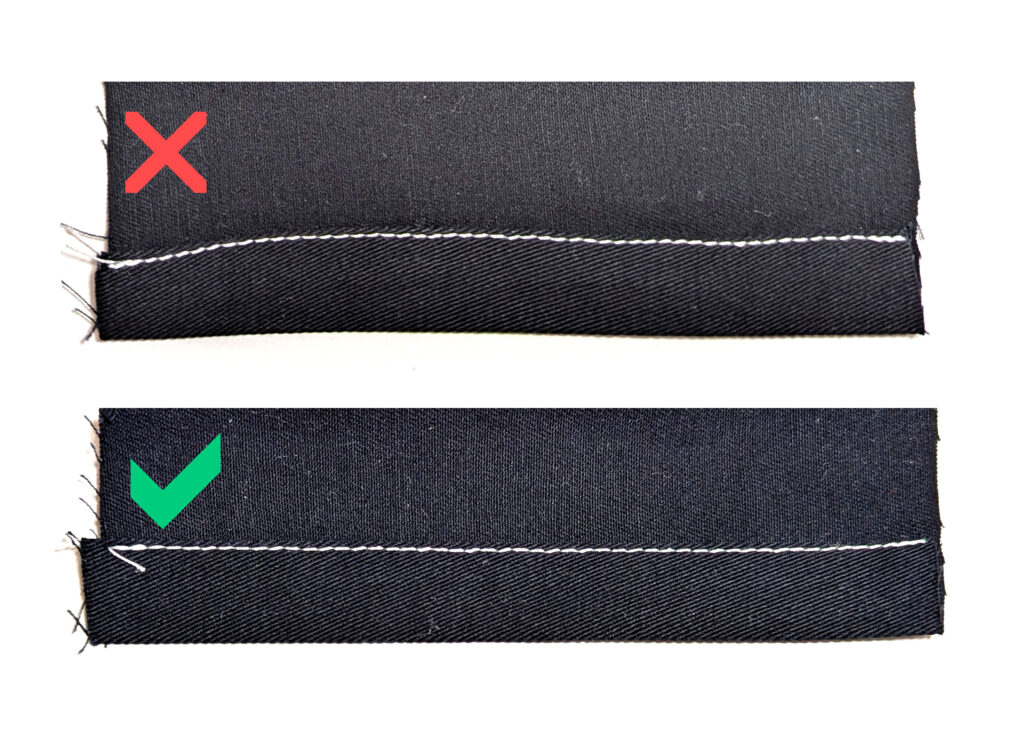
Bottom: even hem and stitching
Evaluate stitch tension
Stitch tension is another thing you’ll want to check on your sample. You’ll know the tension is off if you see loose loops on one side of the stitching (tension too loose on one of the threads) or if the whole seam line bunches up like it is beginning to ruche when it is not supposed to (tension too tight).
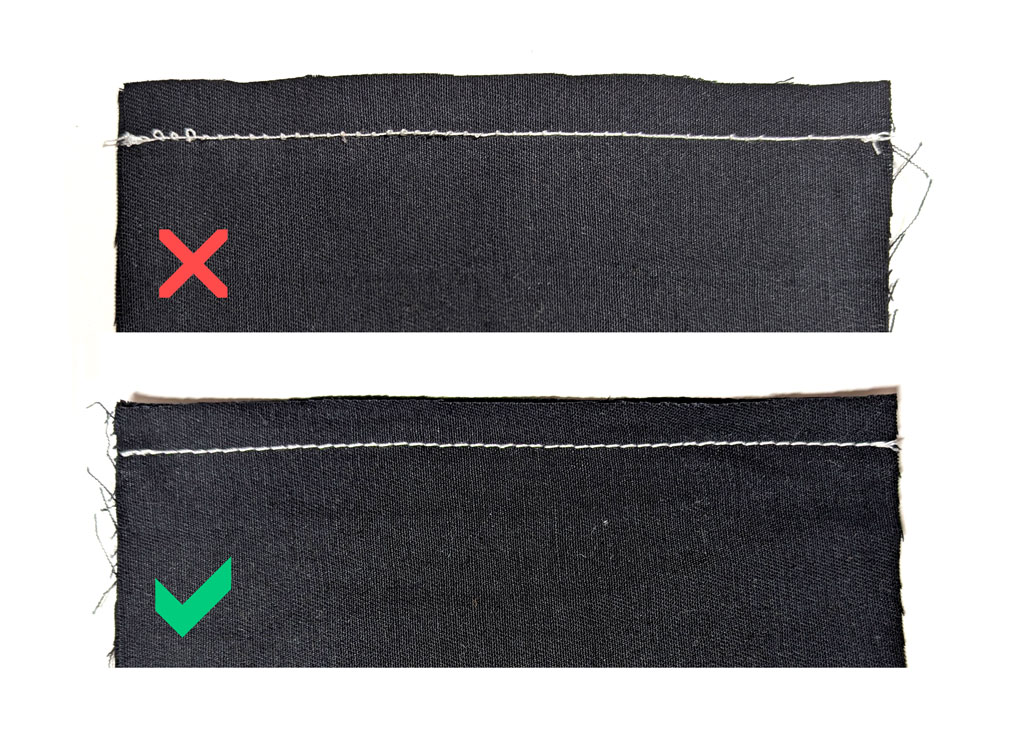
Bottom: tension on 301 single needle stitch is correct
Another way to check tension is to slightly tug the two sides of the garment away from the seam on the face side. If the fabric pulls away and you start to see the threads from the outside, the tension is too loose.
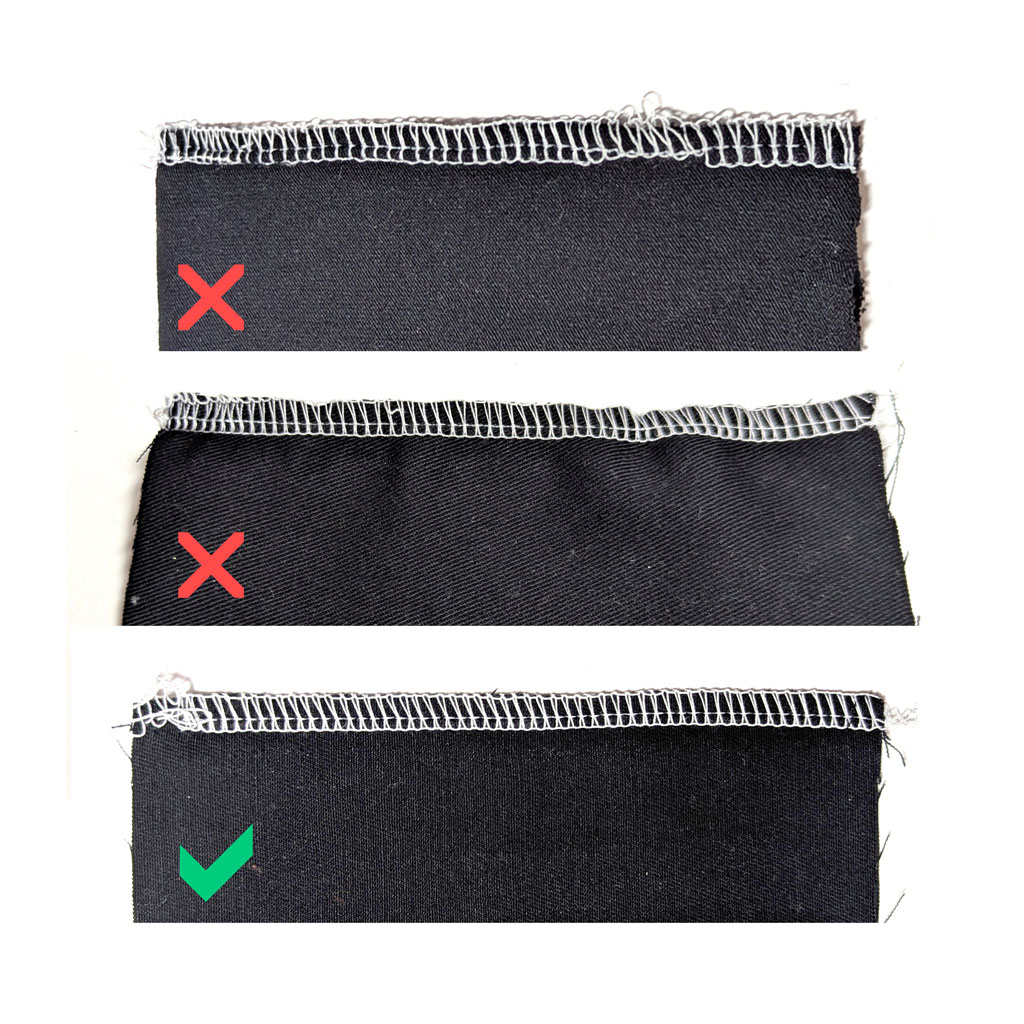
Middle: 514 overedge thread tension is too tight causing gathering
Bottom: 514 overedge thread tension is correct
Almost all stitches use multiple threads and the tension needs to be just right for your fabric on each of the threads in order for the stitching to perform at its best. If you see any of these tension issues, let your factory know so they can re-calibrate their machines with appropriate tensions for the fabric and thread type.
Test seam stretch
Sometimes the stitch looks okay at first glance, but the tension isn’t right for the garment’s end use. If you’ve ever popped a seam on a garment you’ve worn, you know what I mean. This is especially important on garments with stretch. The seams should stretch with the garment.
It is okay for the seams to feel tighter and not stretch as much as the fabric between them, but they should not break or hinder the movement of the wearer. Moderately tug at the seams of the garment to test their stretch. Your fit model should be able to put on, wear as intended, and take off the garment without risking any seams breaking.
On the flip side, seams can be stretched out in sewing too. You’ll see this on the garment as waviness. Unless it is supposed to be a lettuce hem that is intentionally stretched to give it a curly look, well-sewn seams and hems should lay flat and neither bunch or expand the fabric around them.
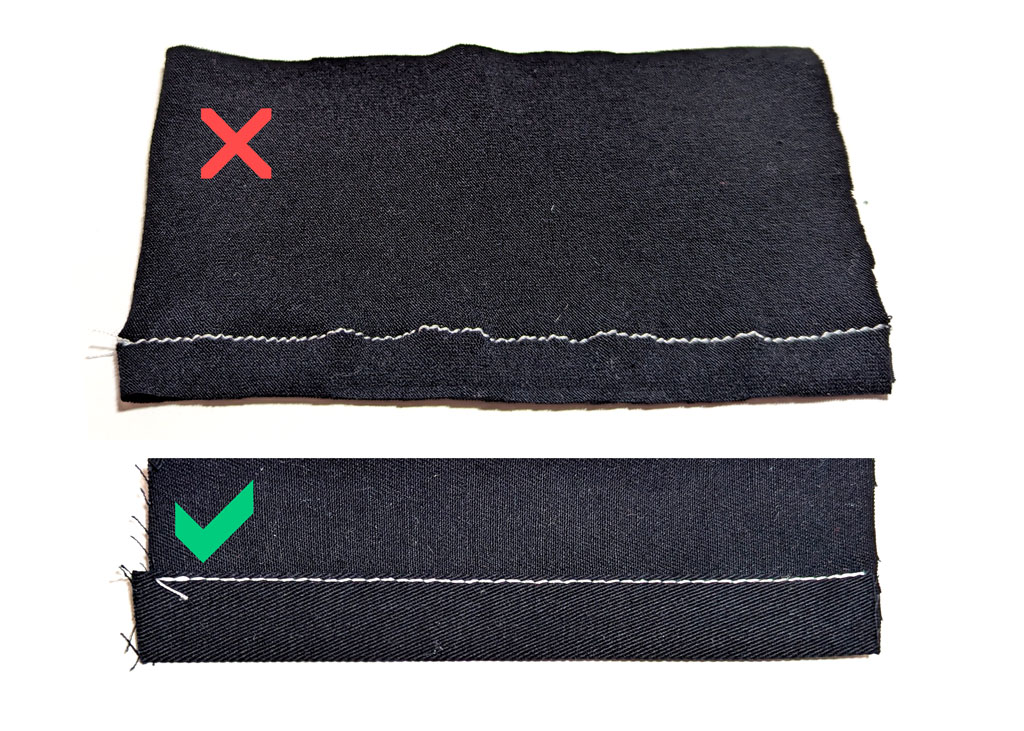
Bottom: hem is not stretched and lays smooth and flat
Note thread cleanliness
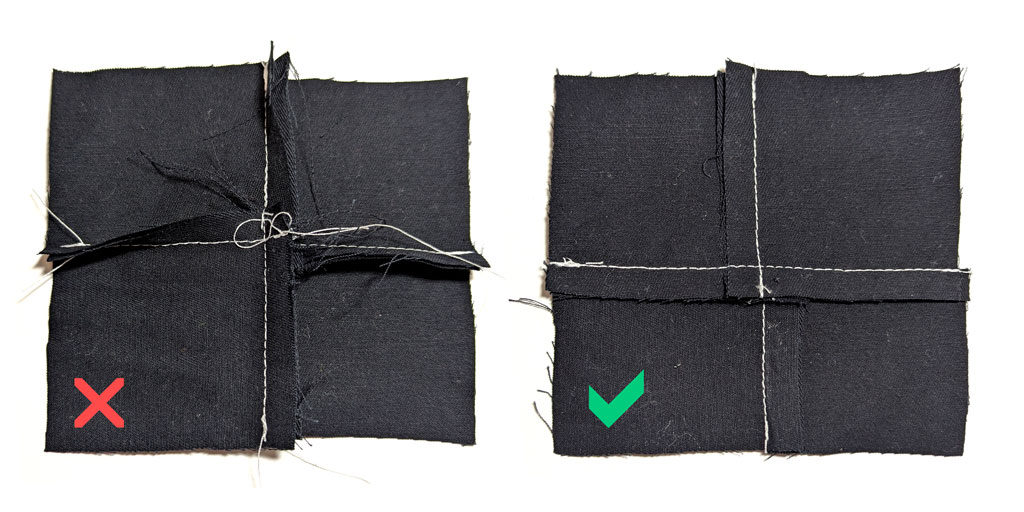
There will be more threads at the beginning and ends of seams and where multiple seams meet, but you don’t want a mess of threads. Turn the garment inside out (or look between the shell and lining) and note how neat the threads are. If you see thread clumps or loose threads hanging inside or outside the garment, make a note to the factory. If this is the only issue, it is relatively minor and easy to fix by clipping loose threads, but you don’t want to have to do this for every production garment.
Assess sewing skill
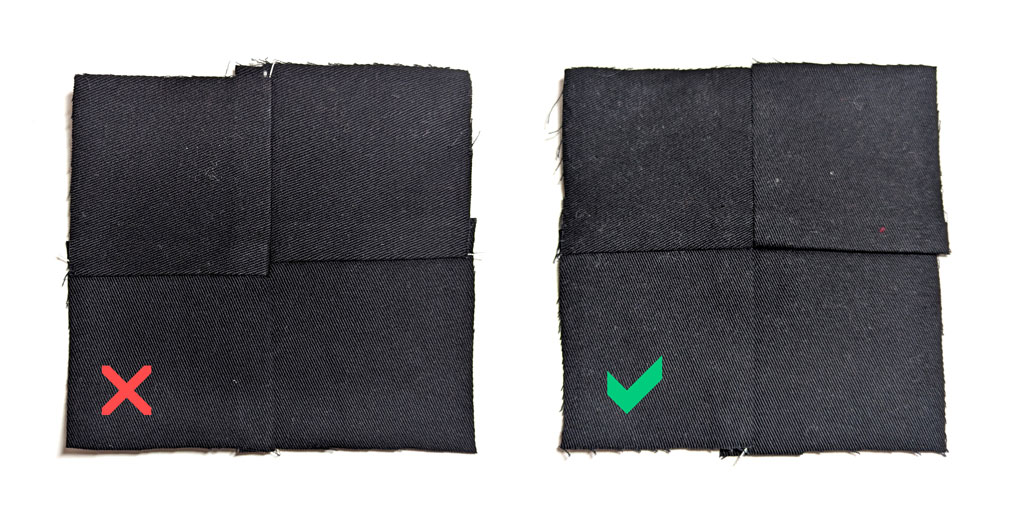
When looking at the corners and areas where seams meet, pay attention to whether they line up or not. When seams are supposed to align – for example the waist seam lining up across a center back zipper or an armhole seam meeting the side seam at the same point – extra care is needed in sewing. If the seams don’t align, this could be an issue with sewing or it could be due to a poorly made pattern.
Also check for holes in the fabric near stitch lines. This indicates that either the wrong needle was used, or the seam was taken out and sewn again. Undoing a seam and redoing it weakens the fabric so you’ll want to avoid that. With some delicate fabrics, you really only have one shot at sewing it. Make sure that your factory is comfortable and experienced with the type of fabric and sewing your garment requires.
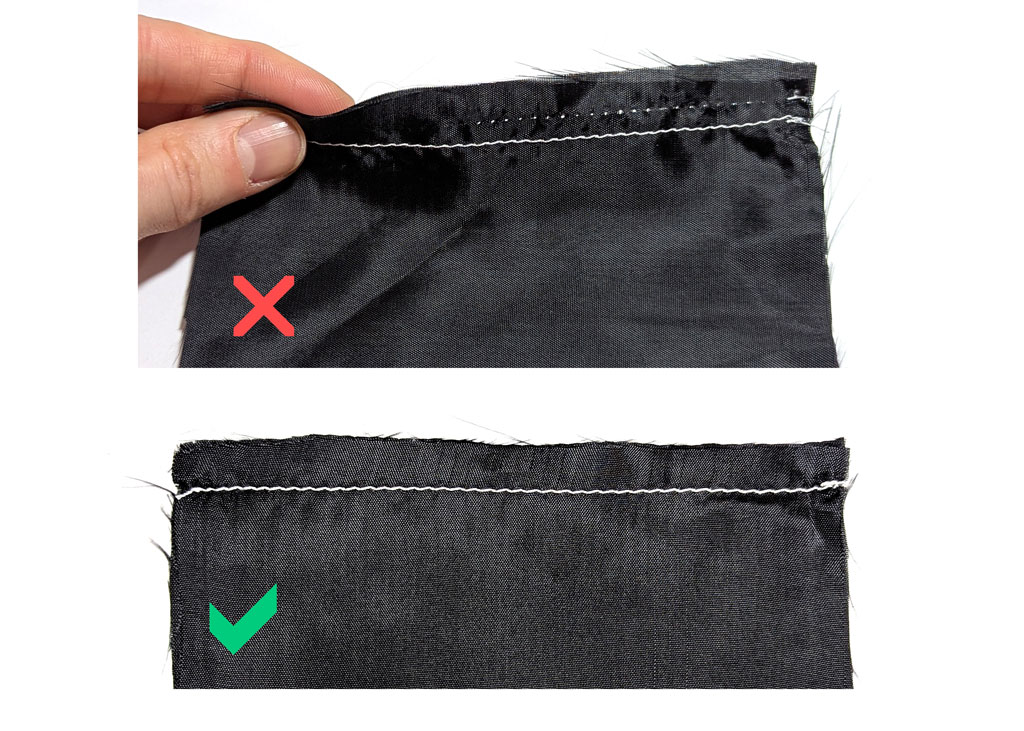
Bottom: stitching is clean and has not been redone
Also look for what is called “roping” on hems. This is when the hem fold gets offset from the rest of the fabric creating diagonal pull lines along the hem.
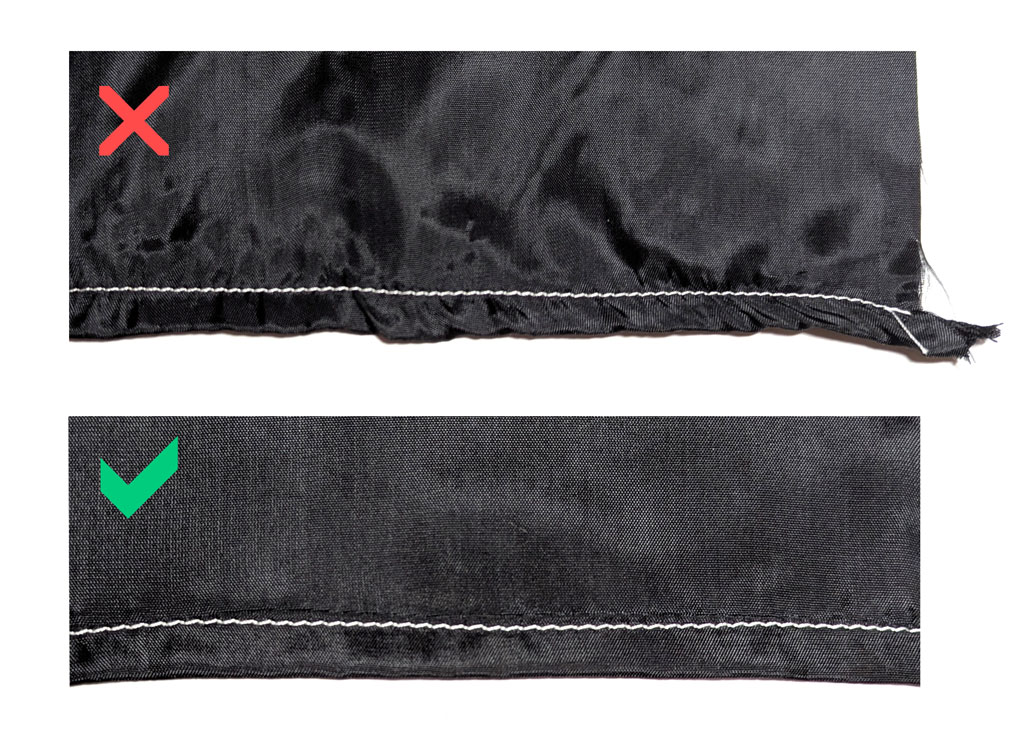
Bottom: hem is smooth and lays flat with fabric
Confirm the right needle was used
If the wrong needle was used to sew your garment, this will show on the sample in a few ways. One indication of a wrong needle is that threads within the fabric are snagged perpendicular to the stitch line. This is because the needle isn’t sharp enough to pierce the fabric cleanly and instead is pushing threads down with the needle.
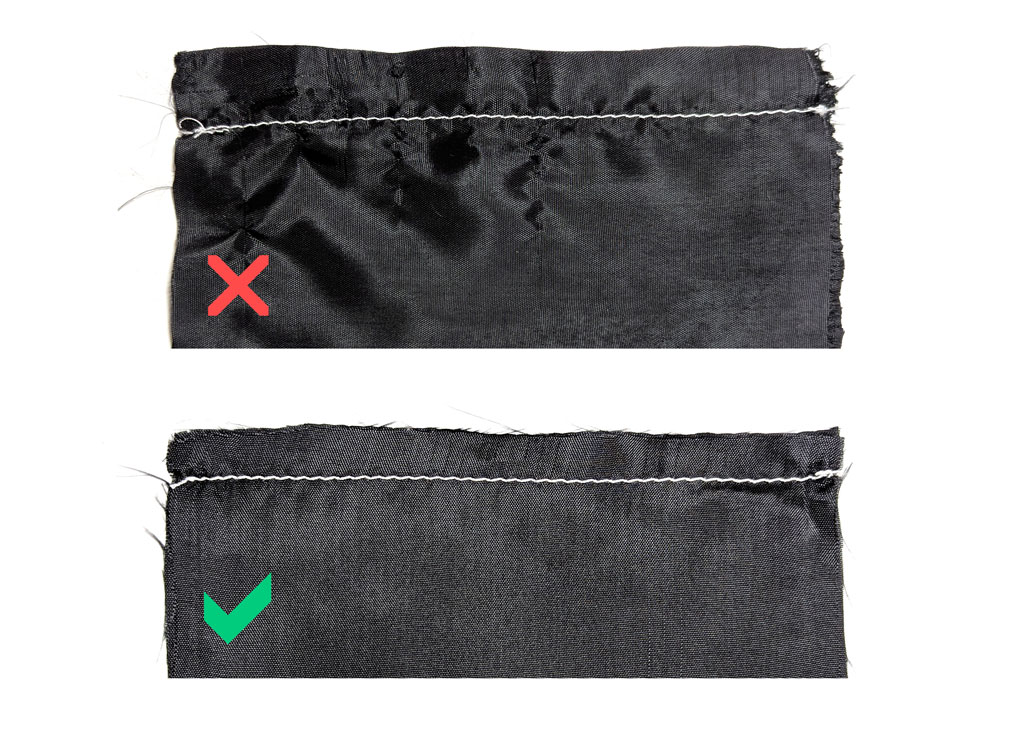
Bottom: the correct needle size and type for this fabric was used which didn’t damage fabric
Holes in the fabric where the needle went through is also evidence of the wrong needle type or size. Lightly tug at the seam or hem to see if there are tiny holes around the stitches. If you see either of these in your sample, let your factory know.
Skipped stitches are yet another indication of a wrong or dull needle. Skipped stitches look similar to large, uneven stitches. The difference is that overall the stitch length is even, but every once in a while there is a double or triple-long stitch. On finer fabrics, you will see the needle holes where the stitch was supposed to go.
Check the security of seam ends
The last thing to check on your sample is the seam ends. They should be tacked securely and not pull apart when tugged. Single needle stitching is backtacked at the beginning and end of the seam line. Coverstitched hems don’t have a backtrack, but the beginning stitching is overlapped by the ending to secure it. Overlocked stitches need to be secured by a hem afterwards or tacked at beginning and end to secure them.
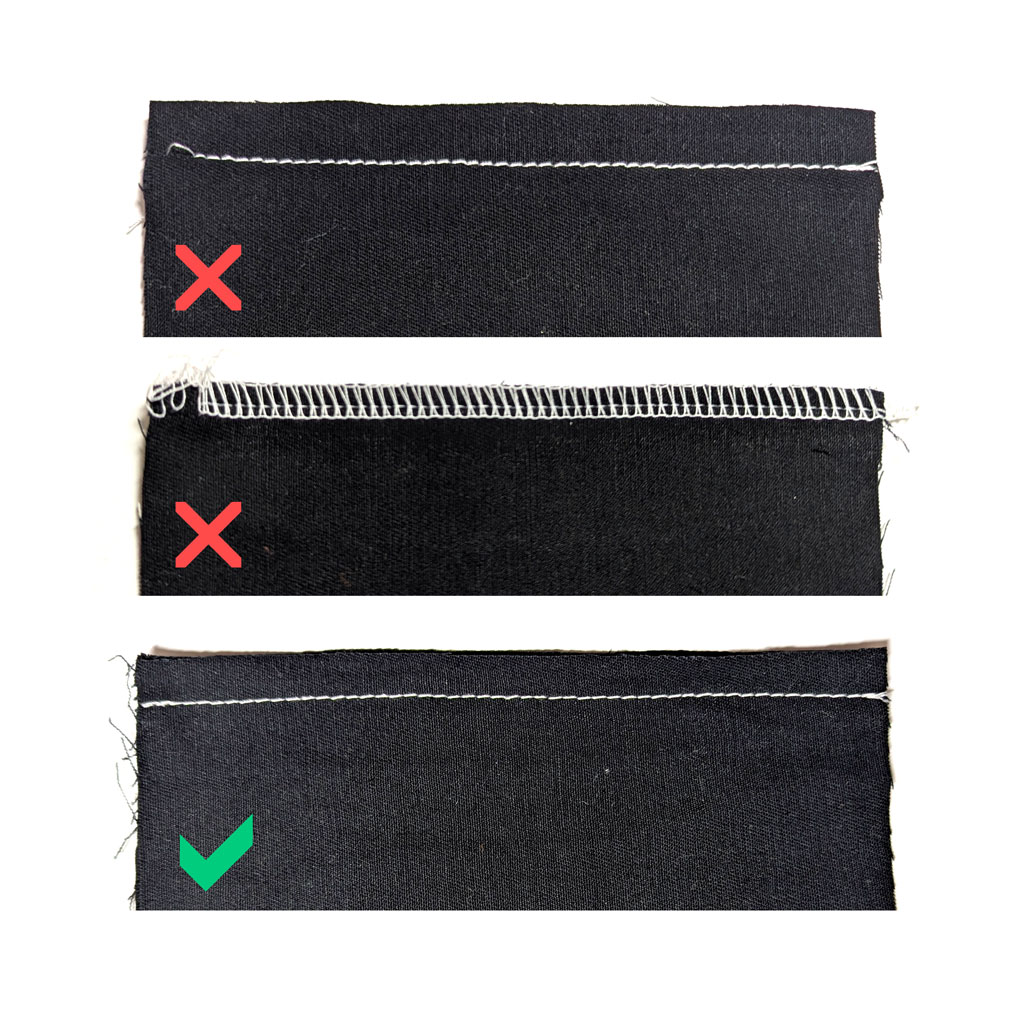
Middle: 514 overedge not secured with tack or hem and is unraveling
Bottom: 301 single needle stitch secured at both ends with backtack
These are the things I look for when evaluating a factory sample for my clients. When there are issues with the sewing quality of the sample, you have time to address these with your factory before you order bulk production. When everything looks good, you can go into production confident in this factory’s workmanship.
