The right print can make a garment a showstopper. It can add color, fun, and uniqueness to a garment and can be very flattering on the body. Designing printed apparel isn’t as easy as picking out a print and having the fabric made into your garment though. There are things to watch out for to make sure the print flatters your design and the wearer as well as stays within your budget.
Print directionality
Some prints have directionality – meaning the artwork elements all face one direction or the layout draws your eye in one direction more than another. This can be used to your advantage if you were planning for it but can be costly if you weren’t. Directional prints are used sparingly for apparel because they require more fabric. All the garment pieces need to be cut facing the same direction as the print, and most of the time that means it takes more fabric per garment.
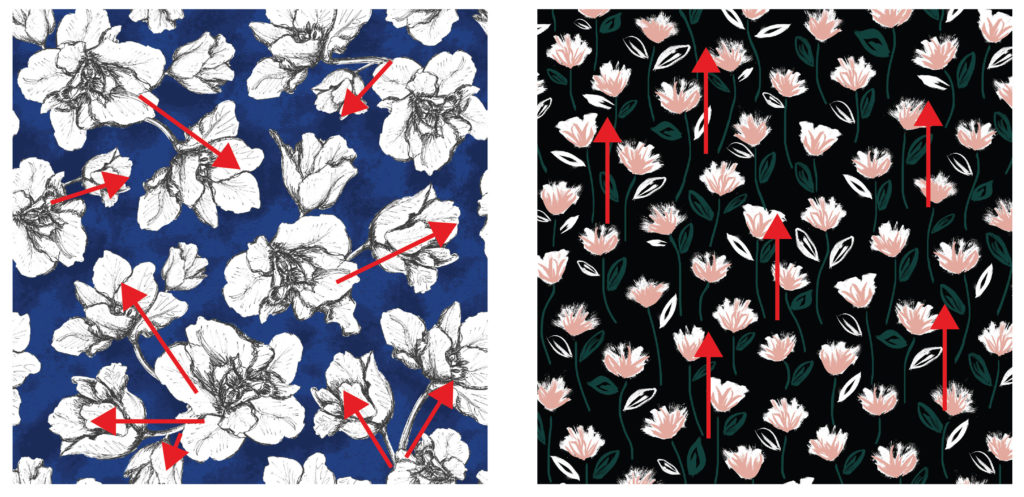
If you’re not sure if your print is directional, a good rule of thumb is to look at a section that is right side up next to a section that is upside down. Do you notice a difference? Sometimes the difference is slight and you can get away with cutting normally. It is helpful in this situation to mock-up some CAD drawings or get a few samples made to see if you like it. You’d have to be okay with one garment on the rack being cut one way and the next being cut the other, or you may end up with the sleeves (or one sleeve) cut facing one way and the body facing the other.
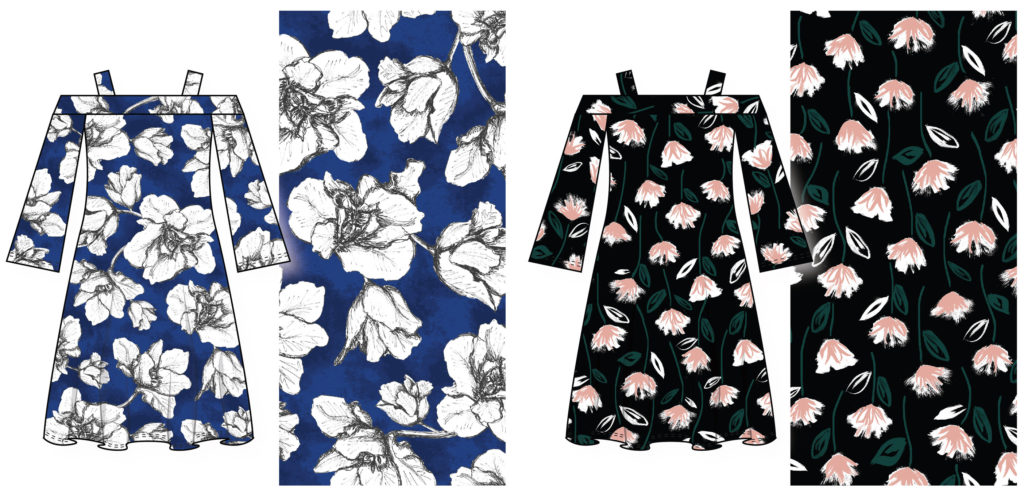
Both prints are upside down on the body but on the blue floral, you don’t notice.
Print scale
Another thing to watch out for is the scale of the print compared to the size of your garment. If you are designing a garment that is small or is made up of small pieces – a bikini top for example – you will probably want a smaller print than if you were designing a floor length dress. If you use a large-scale print or one with a lot of open ground on a small garment, one of two things will happen. Either the artwork elements will get cut off and you will lose the look of the print, or each garment will look very different from the next as they each are cut from a different section of the fabric. As you are choosing a print for your design, keep in mind how the scale will look on the size of your garment.
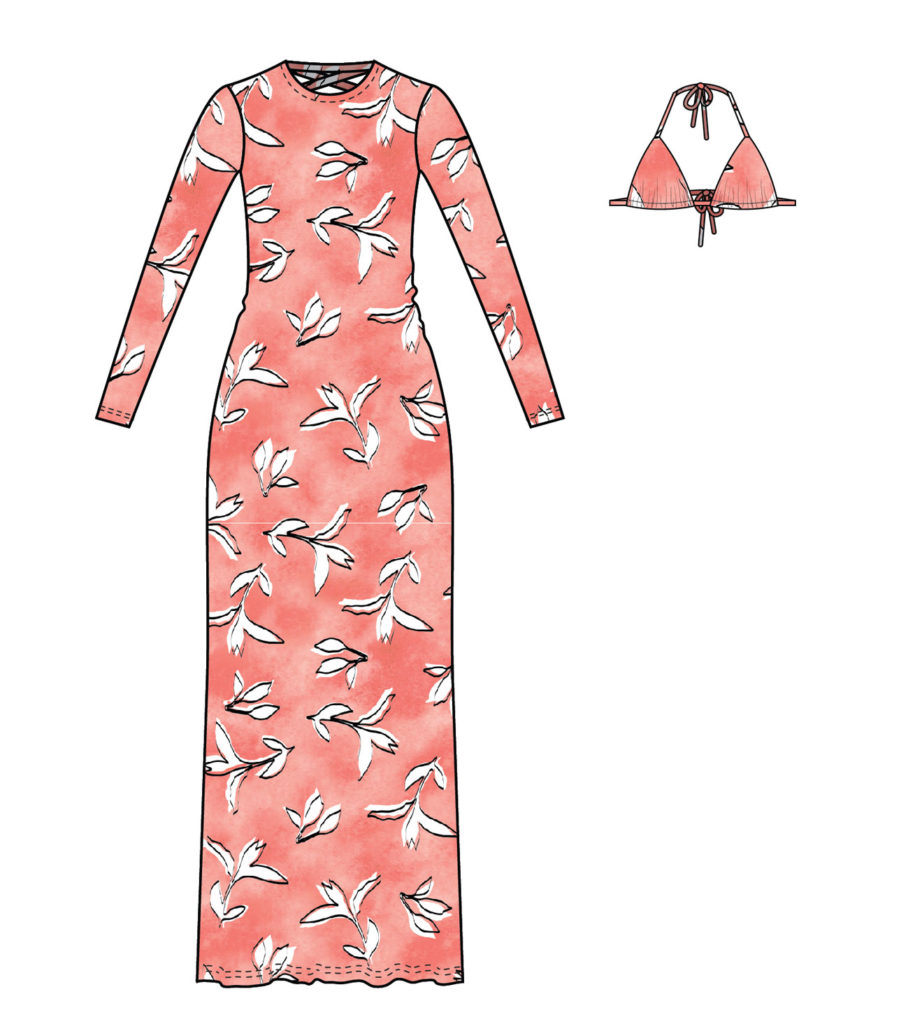
You can see on the bikini top the print gets lost because it is cut off.
Designing with stripes and plaids
Stripes and plaids, although simple prints, often require more planning to look good on a garment. Because stripes are so straight and linear, they look best on garments that have fairly straight pieces. They can, of course, be used on garments with curve-shaped pieces, but they won’t have the same effect. A horizontal stripe on a curved hem or arc-shaped skirt will appear to droop towards the side seams. When you use a stripe on your design, make sure you know what to expect from the final product.
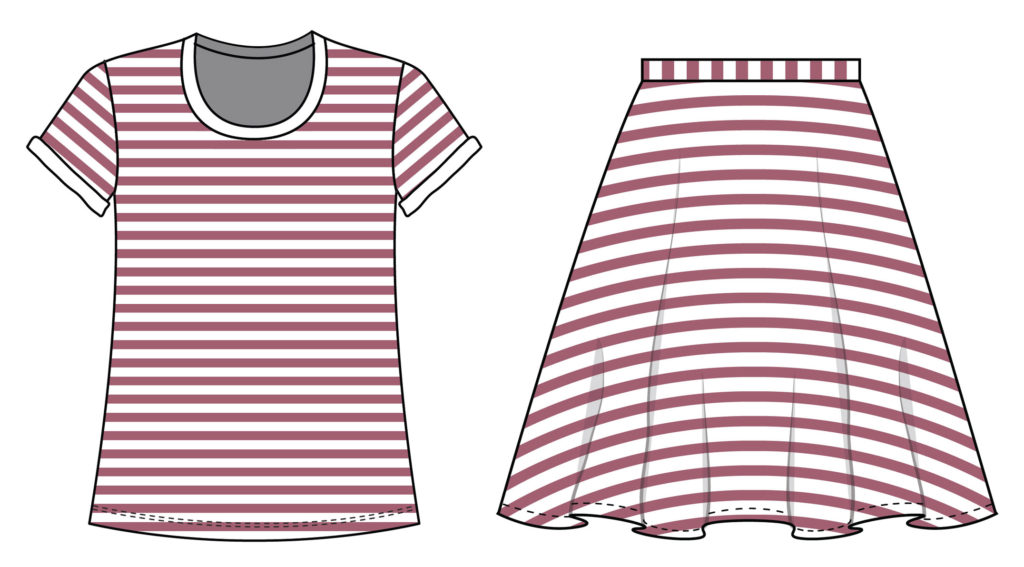
Whether or not to match stripes and plaids across seam lines is another thing to think about when designing printed apparel. It usually requires more fabric to cut the stripe or plaid to match across side seams, sleeves, etc. so you’ll see this done more often in higher-end apparel. Smaller stripes usually look okay without being matched. Larger ones, however, can look disjointed or busy when not matched. Plaids add another dimension of matching as they can potentially be matched both horizontally and vertically on the garment. Consider your price point and the stripe or plaid you are considering to decide whether you want your design to be a match-stripe or not.
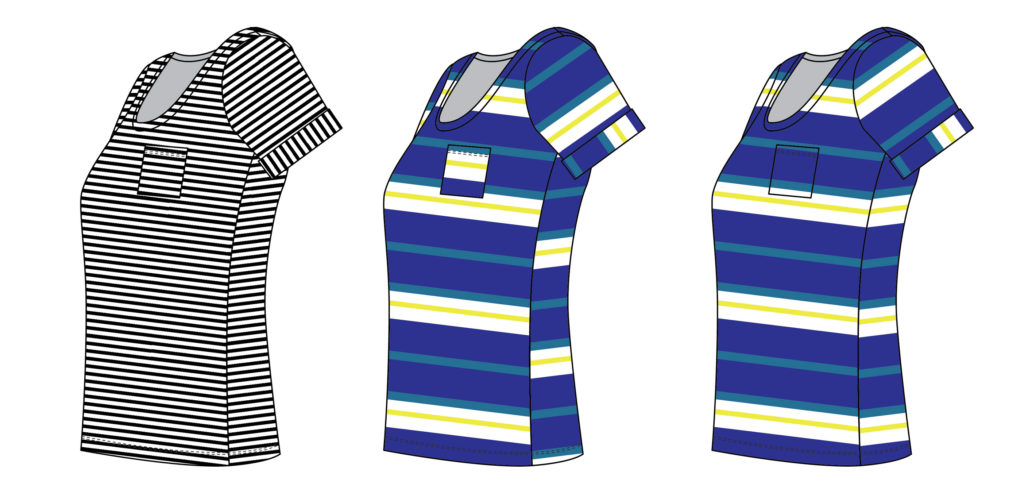
On the small stripe, you can’t tell that it isn’t matched. Match-stripes are more of a concern on larger scale stripe prints.
Print placement
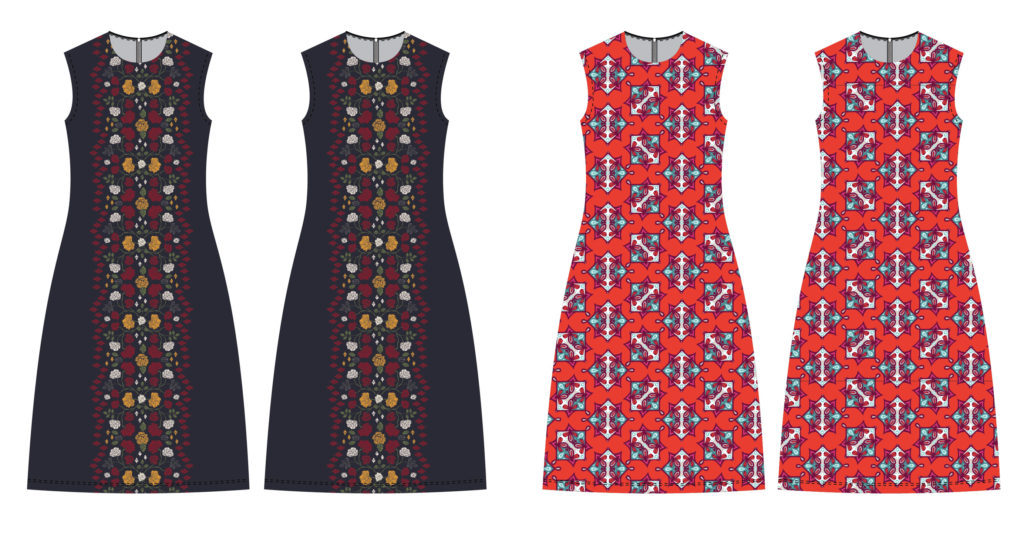
Another thing to watch for is how the print is placed on the garment. With some methods, you have complete control over the print placement on the garment, and with others you have none. The cheapest method is where the print is repeated across the roll of fabric and the garments are cut out of the fabric the same way as if cutting from a solid fabric. This offers little control and each garment will have a random placement. The more expensive way with the most control is to use an engineered print. Engineered prints allow the fabric and pattern pieces to be cut so that the print is placed identically on each garment. This is a great method to use for borders, mirrored center front prints, or ombre effects.
Because you don’t have control over the print placement using a repeat print, you need to observe how the random placement will look on the finished garment. Sometimes you’ll have to adjust the print layout or scale to get it to look nice on the garment across all sizes. For example, I’ve had to adjust the scale of large-scale medallion prints to make sure that the rows of circular medallions aren’t placed right on the bust points — drawing too much attention there.
With engineered prints, work with your textile designer, patternmaker, and factory to make sure you order the right amount of fabric and the pattern is set up to accommodate an engineered placement. There is a lot of planning and precise measurements that go into engineering a print.
Balancing print and design details
Prints can be a great addition to a garment, but sometimes the busyness of the print hides the design details of your garment. Small details like a row of self-covered buttons or sculptural style lines can end up overpowered and hidden by a bold print. Large numbers of style lines will also change the look of your print as it would have to be cut in smaller sections and spliced together. You may want to modify the non-functional design details to simplify for a print or decide to run the style in a solid color instead.
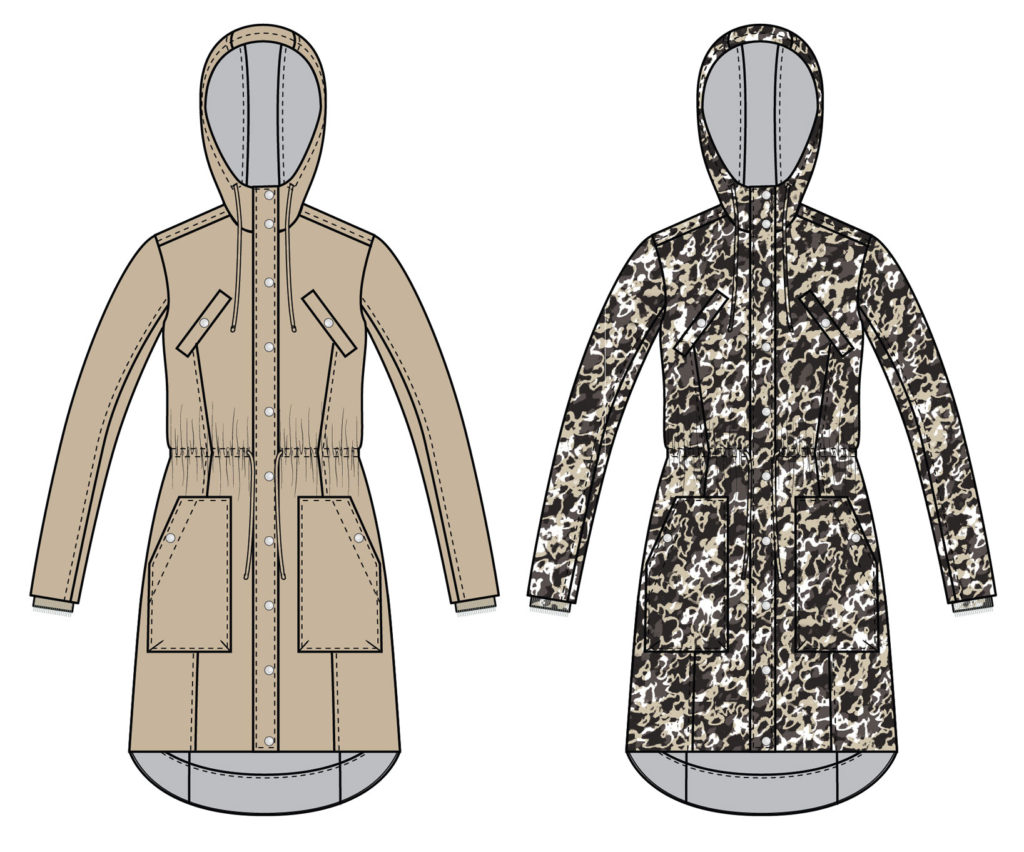
Prints can add so much to a garment but designing printed apparel isn’t as easy as choosing a print and assigning it to a style. You’ll need to watch for print directionality, scale, stripe matching, placement, and garment design details and plan accordingly to make the design successful.
